Tamera Mowry Slow Cooker Beef Stew Recipe
If you saw my turkey chili recipe, you may have noticed how crazy I am about my slow cooker lately. It's an essential as a busy momma! I recently made this beef stew that turned out too delicious not to share (and was mommy makeover approved, too – major bonus!). Here's what you need…

Ingredients
1lb beef stew meat, cut
2 parsnips
2 potatoes
1 onion
3 carrots
2 celery ribs
4 cups beef broth
Small can tomato paste
¼ cup flour
2 garlic gloves, minced
2 tbsp olive oil
1 tsp oregano
1 tsp parsley
1 tsp brown sugar
Salt & pepper
Dollop of nonfat Greek yogurt and splash of lemon juice, mixed together
Instructions
1. Chop beef, coat in flour, and brown in a skillet. Place in slow cooker.
2. Add oil to pan. Combine tomato paste and beef broth and heat, stir in flour and continue to stir 1-2 mins.
3. Stir in herbs, salt and pepper, and brown sugar.
4. Lastly, chop and sauté all veggies until slightly soft, then transfer to cooker.
5. Give it a good mix and cook on low for 6-8 hours.
Optional: Top with the yogurt blend to give it the flavor of sour cream but healthier.
This will make a BIG pot for the whole family. Snip some fresh herbs and toss 'em on top!
What other kinds of recipes would you like to see on the blog? I'll get cookin'! J
Xx,
Tamera
Before I had Aden, I didn't think too much about baby food. Of course I wanted my food to be organic and homemade. So when we were expecting, I started to think about how my baby could benefit from that too. I found that even the popular (and more expensive) baby food brands did not guarantee fresh or completely natural ingredients. Like a lot of other products, a label that says "natural" or "wholesome" still doesn't always live up to the name. And with your baby you want the highest quality you can find. The only way to really know what's in your baby's food? To make it yourself!

From about 6 months to a year I made Aden's meals, and learned a lot about creating food for baby. Such as:
- It's pretty simple – babies of this age need single ingredient meals, which help them digest better, plus help you find out what they like and don't like, or might have allergic reactions to. Much harder to pinpoint an allergen if there's several mystery ingredients.
- You're doing the same thing as the big baby food companies do, except it's not only fresh but way less expensive. Think of the cost of half a banana or serving of peas, for example.
- Puree, blend, mash – there are many ways to make it soft and easy to consume
- Foods still need cooking – You can steam veggies or boil sweet potatoes, for example. When softened you can create the puree and refrigerate.
- When you're starting out, you can find a ton of recipes online
- For busy moms – mash and freeze. Prepare the meals and then freeze them in ice cube trays to save time
I think most of us would like to say we make each and every meal by hand, but the biggest roadblock is time. Believe me, I know – but the biggest thing is finding out that it IS an option. And when times get busy and you can't make every meal or even most of them – don't sweat it! I've relied on other options too. Moms have more opportunities for fresh foods than ever, such as product lines like Agatha's Yummy Spoonfuls and Caer (pictured above), which delivers organic meals full of nutrients straight to your door. It's a great way to guarantee freshness and quality when you're too busy to be in the kitchen all day.
Share your experiences with baby food with me below.
Xx,
Tamera
For the most part, my family and I try to eat pretty healthy. We love fresh foods and Adam is the big cook in the house so we really love our nights in relaxing over a good meal. However, now that I'm in the midst of my mommy makeover, my diet is even stricter. I've learned that as much as working out can transform your body, you have to meet it half way with the diet part. It's easy to lose motivation though and succumb to sweets and heavy meals, which is why it's important to keep a few healthier snacks on hand.

Enter, energy bites! These treats are small but mighty, and because I made them with a flax and chia seed infused peanut butter, they're also rich in fiber and protein. Don't you love when you come across a food you'd munch on, diet or not?
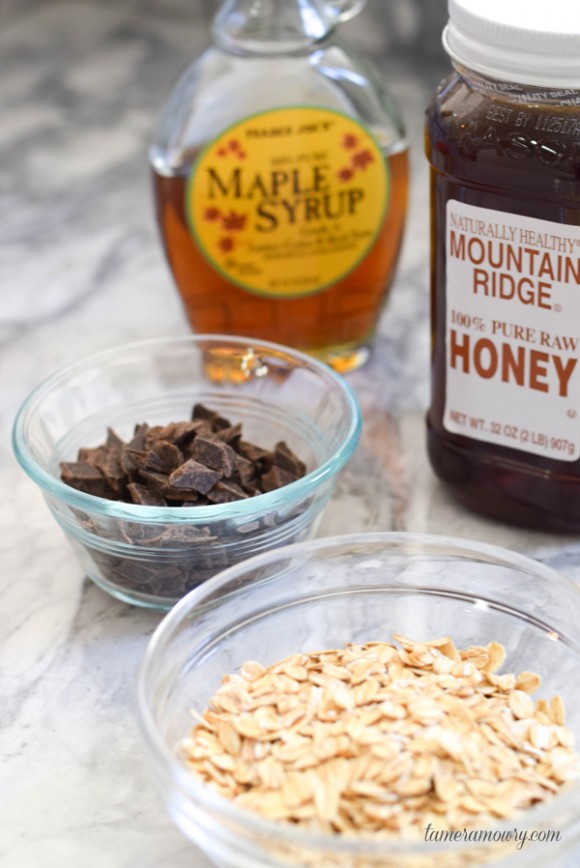
Easy No Bake Energy Bites
¼ cup pure maple syrup OR raw honey
2 cups uncooked rolled oats
1 cup crunchy peanut butter (Trader Joes has peanut butter with flax and chia, but you could add those in separately. You could also try almond butter!)
2 cups chocolate chips

Combine all ingredients except chocolate together in one bowl and mix until evenly distributed. They should be nice and sticky. One by one, roll them into bite sized balls. Pop them in the fridge for at least 10 minutes to firm up before adding the chocolate.

An optional (but key!) last step, is to melt the chocolate and drizzle on top. Afterward, store it in the fridge until the chocolate cools, and afterward you can store in covered containers.
Great for the mom with NO time, too! Pass them out to the little ones, but make sure to say they're cookies rather than bites ;)
Xx,
Tamera
These past few months I've been stepping up my workouts for my mommy makeover journey. I went through this with Aden and I know it was going to be tough – but it's another a new experience. Today I'm sharing some secrets and tips I've learned from the Helene Guzman of LA Rox Fitness (who I worked with during my pregnancy). I wanted to be able to pass these tips on to anyone working from the gym or home!
The #1 thing that has been working for me during this journey is varied workouts. Yes, it's that simple. If you're struggling to get in shape or lose the weight, let me tell you why switching up your workouts frequently is SO important. Working out post pregnancy is simply not like any other fitness regimen – we're already juggling so much as moms. Even just making the commitment to focus on YOUR health seems tough when there's a whole family vying for your attention. Mundane workouts just don't work for me. There's no easier way to lose motivation than to get bored with your workout.
Yes, at times working out feels like a major chore. That's a given – but if you put in the time to learn new exercises – even doing several different ones in the same workout sesh – you'll find a renewed love of taking care of your body. Where to start? Thankfully Helene has a ton of workouts up her sleeves, so I wanted to share a couple faves from a recent session. Here goes…
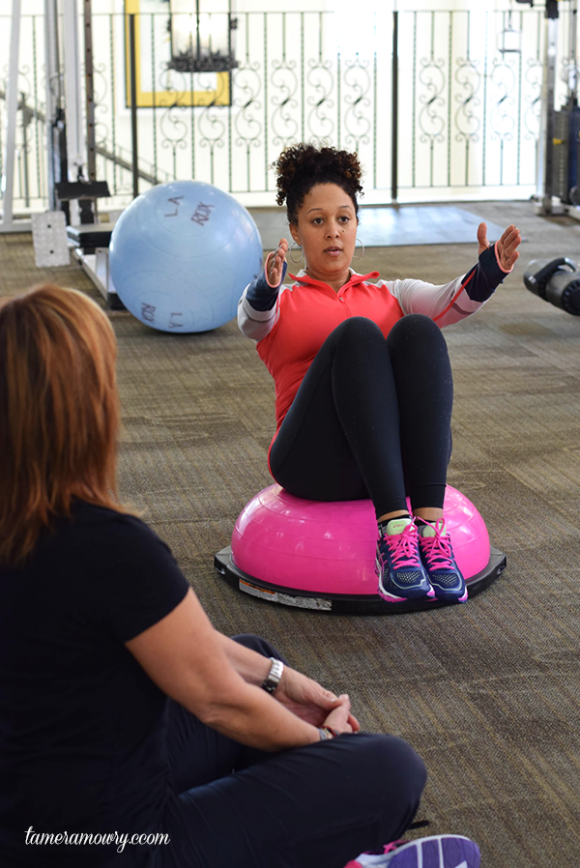
Bosu ball.
You'd never guess the kind of burn that comes from this unsuspecting piece of equipment! Bosu Balls are pretty simple, yet open the doors for tons of different workouts, and can be used on both ends. They're great for strength training, especially your core, and of course balance.
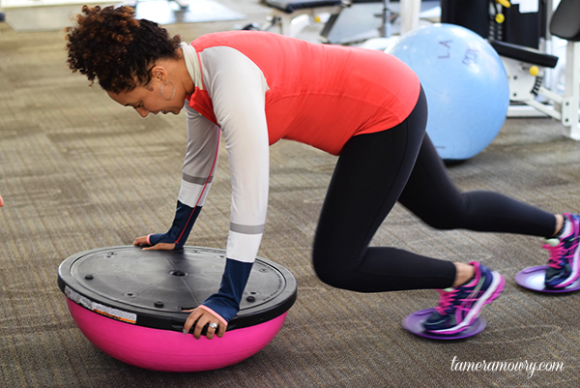
With these balls you can do variations of tons of traditional workouts like the mountain climbers I'm doing above. Traditional mountain climbers are done without equipment, but Helene added the Bosu Ball and Gliding Discs under my feet to take things up a notch. Since there's less stability, it's a lot tougher. If you try this and things are shaky at first, don't worry! You CAN regain the strength you had pre-pregnancy!
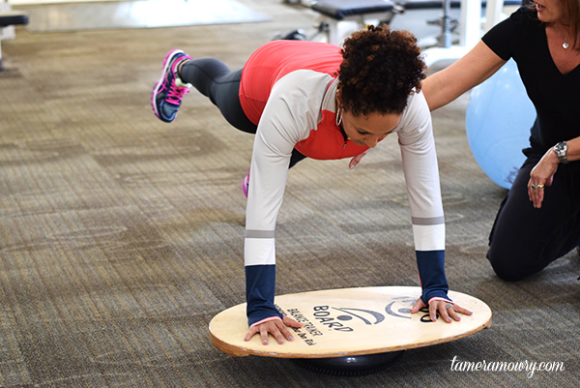
I've also used Indo boards, which open another door for workout possibilities.
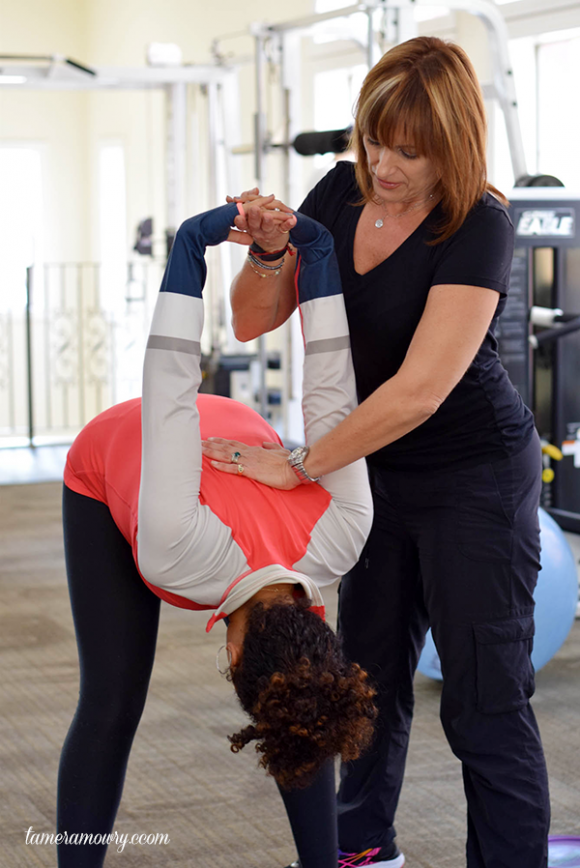
Stretching throughout.
You've probably heard about stretching before or after your workout, but doing so throughout will keep you loose through the session. It's also a far more productive break than just waiting to catch your breath before the next activity. Even the stretches you do can be switched up from time to time to keep things exciting.
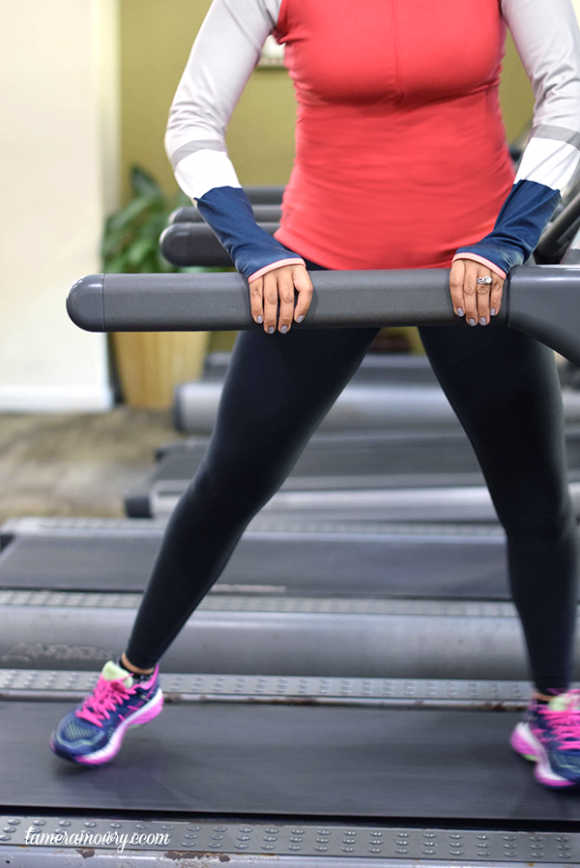
Treadmill switch up.
Have you ever seen anyone do this impressive move at the gym? Not gonna lie, side hops on the treadmill aren't easy! They work your muscles in a new way. You will fill the burn throughout your calves and thighs. But just a minute on each side (make sure not to go too fast and use the arms for support) will refresh a mundane cardio sesh, and the interval training helps keep your heart rate up and encourages quicker results too.
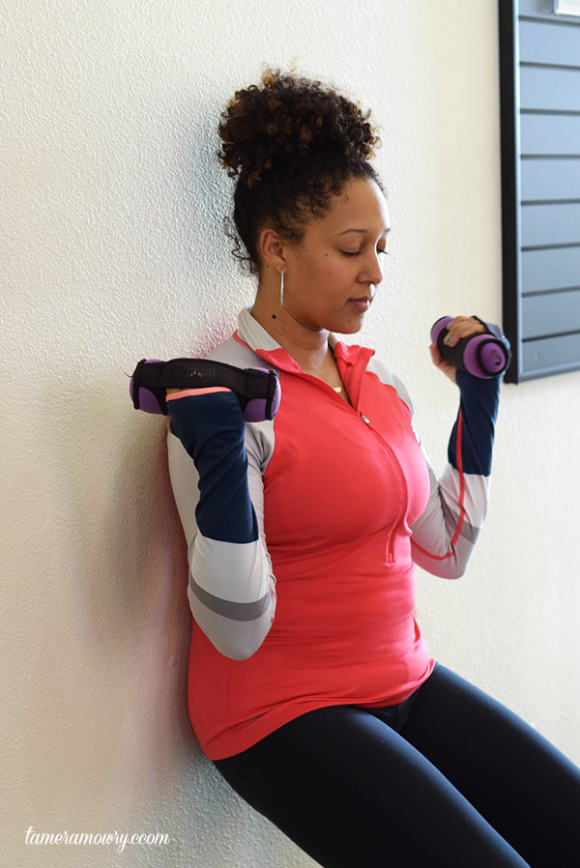
Wall sits.
Ah wall sits! Remember these from gym class? You don't always need equipment to increase strength – though hand weights can in help you do two workouts in one – just a little patience. To stay motivated, time yourself and take note of how you improve. Keeping your eyes closed is even harder and helps you be aware of what's happening in your muscles. This is a great exercise that can be done from anywhere.
If you're looking to try a few new workouts, it's best to do so with a professional. Many gyms offer free first sessions or trial periods so you can get the hang of the exercises and decide whether to continue with routine sessions or try them at home. YouTube is also a great place for workout videos!
Thanks to LA Rox for helping me step up my post-pregnancy workouts!
Xx,
Tamera
Happy Monday! Spring is right around the corner (or at least that's what I'm telling myself) and with that comes days sipping lemonade on the patio. Even better when it's flavored with herbs from the garden, which Adam recently revamped! With Valentine's Day coming up this Sunday, I thought it would be fun to share one a quick and easy festive DIY project along with a delicious drink for any of you entertaining. Here's what to do…

First, get crafty. Purchase paper straws and colorful felt which you'll then cut into hearts. With a hot glue gun, place a small dab of glue and attach it near the top of the straw. Lay them out and way for the straws to dry while you whip up the lemonade.
Now for the lavender lemonade recipe…

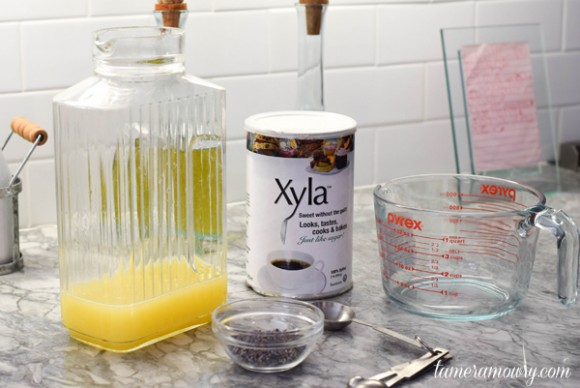
Gather your ingredients. The process will be the same as my classic lemonade recipe, but with the addition of lavender. For a healthier drink, I love Xyla in place of sugar. It's an all natural sweetener with 40% less calories than regular sugar. It sweetens drinks without that crazy sugar crash too.
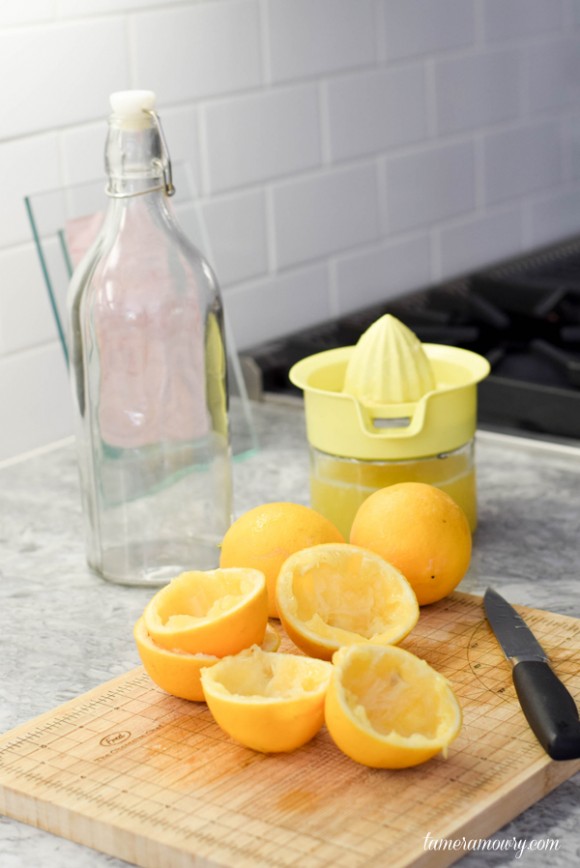
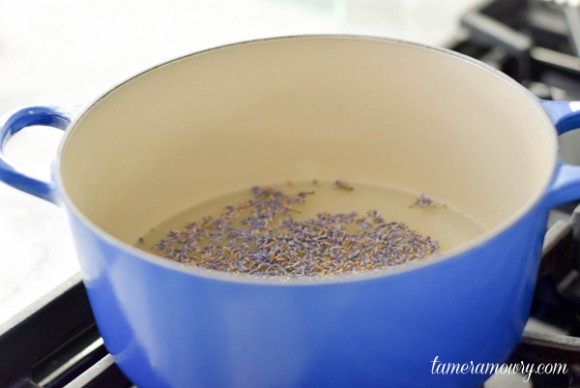
Like with classic lemonade, you'll want to dissolve the sugar/sweetener in the water beforehand. During this step you can infuse your lavender – just a handful for a six-serving pitcher is necessary, but you can add as much as you'd like to taste.
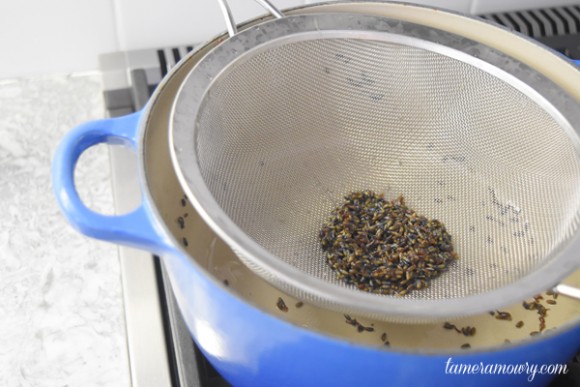
When finished steeping and sugar is dissolved, strain the lavender with a fine mesh strainer. You'll want to keep your strainer handy when to remove any stray seeds from your lemon juice as well.

Combine the sweetened lavender water with the lemonade and chill in the fridge. The more lavender you add, the pinker your juice will turn. Add a few drops of food coloring if you prefer a lavender hue. I enjoy the subtly of the flavors here, however!

The good stuff!

Adorn them with your cute straws and you have the perfect Valentine's drink. Kid friendly too :)
Do you have Valentine's plans?
Xx,
Tamera
Today's post is by Agatha, the founder ofYummy Spoonfuls. This month, she's sharing another amazing recipe (remember this incredible side dish?) that's perfect to kick off the new year!
Mamas, Happy New Year!
Did you make a resolution this year or are you ignoring all the brouhaha? Whatever decision you made this year, I bet eating delicious food whenever possible is still a priority, right? We all know that food is more delightful when we don't have to spend all day in the kitchen, and that delicious food will taste even better when it is not complicated to make. Whether you yearn for healthy food, comfort, or diet food, if you need a speedy wholesome meal you all will love this recipe. I love it because it is also very versatile—you can make little changes without affecting the overall taste. But don't take my word for it—let's cook:
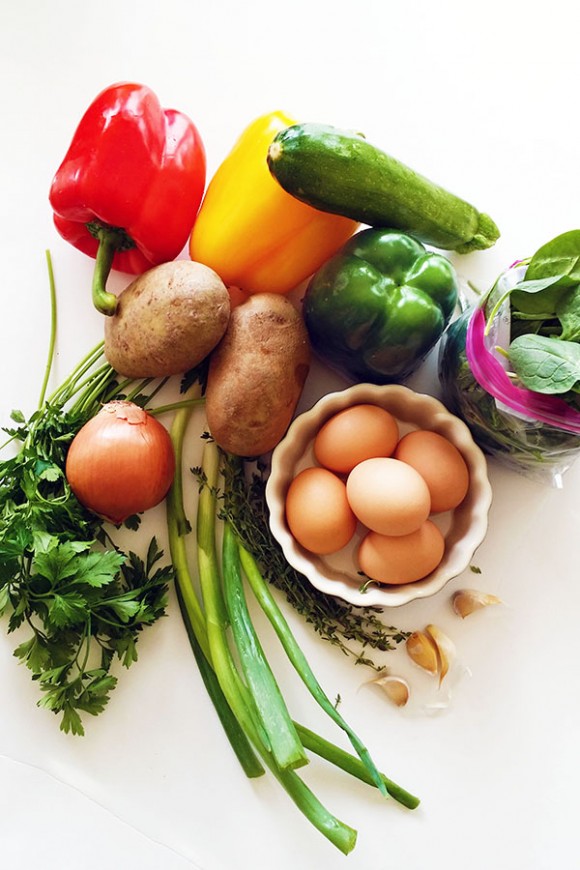
Ingredients
2 medium potatoes (about 12oz), peeled and cut into 1-inch cubes
1 cup water
2 tablespoons olive oil
1 small onion, diced
1 green bell pepper, diced
1 red bell pepper, diced
1 yellow bell pepper, diced
1 small zucchini, diced
2 cups baby spinach
4 cloves garlic, crushed
2 tablespoons fresh parsley, finely chopped
½ tsp fresh thyme
5 eggs
¼ cup milk
Salt to taste

Directions
1. Combine potato and water with a pinch of salt to taste in a skillet over medium heat. Bring to a boil; cover. Reduce heat to low and simmer for 5 minutes or until potatoes are tende. You don't want to overcook it. Drain and set aside.
2. Pre heat oven to 350 degrees.
3. Heat oil in a large saucepan (I use a cast-iron skillet) that can be easily transferred into the oven. Sauté onions for about 5 minutes, then add garlic and sauté 2 minutes. Add ginger, bell peppers, scallions, thyme, and sauté until just tender… about 10 minutes. Add spinach and sauté for about a minute or until wilted. Add potato to skillet, mix well, turn off stove.
4. Combine eggs, milk, fresh parsley and salt to taste, stir well with a whisk.
5. Pour egg mixture into your sauté veggies.
6. Bake in for 30 minutes or until inserted wooden pick comes out clean.
7. Switch from bake to broil for just a few minutes to give the top a golden brown.
8. Cool slightly. Serve as a breakfast meal or dinner with a piece of grilled fish, chicken, or salad.
Enjoy!
Agatha
Source: http://www.tameramowry.com/category/healthy-living/page/10/